Materials Needed from the dollar store: Storage bin, fake moss, brown box/basket paper shred, different sized rocks, colored rocks, sand.
Instructions: Dump materials on table, watch kids have a blast. My kids seemed to really enjoy this table. They made up stories about the dinosaurs, decided the green rocks were either treasure or dinosaur eggs, and made a meeting place for all the elder dinosaurs. Clean up is easy, just sweep it all back into the bin and bring out another day!
Featured Posts
Dinosaur Unit: Animal Track Art
Paint the feet of your favorite animal toys and have them walk across paper!
Materials needed: Paint, paper, paper plates, animal toys.
Dinosaur Unit: Make Your Own Fossils
Make your own fossils with this homemade playdough recipe.
Materials needed: 1 cup flour, 1/2 cup salt, 1 tbsp cooking oil, 1 tbsp cream of tartare, 1 cup boiling water, animal toys with different feet.
Dinsoaur Unit: Dollar Store Sensory Table
Materials Needed from the dollar store: Storage bin, fake moss, brown box/basket paper shred, different sized rocks, colored rocks, sand.
Tuesday, August 27, 2013
Thursday, August 22, 2013
Animal Track Fossils
Materials needed: 1 cup flour, 1/2 cup salt, 1 tbsp cooking oil, 1 tbsp cream of tartare, 1 cup boiling water, animal toys with different feet.
Step 1: Making the dough. Combine flour, salt, cooking oil, cream of tartare in a large bowl. Add in the cup of boiling water and slowly mix it. It is really important to make sure the water is boiling. I tried with just hot water and the play dough had a completely different consistency. Once it cools a bit, have an adult clump the mixture together until it is cool enough for kids to handle. Knead until desired consistency is reached. Feel free to add some sand to give it a cool texture when it's finished.
Thursday, August 15, 2013
Recycled Crab Craft Activities
Possible Materials needed: Red soda cap, red foam paper, yellow foam balls, glitter, sand, water, jar, foil, googly eyes, green/yellow thread, tape, hot glue, etc.
There are so many things you can do with this cute little guy once you make him. All you have to do is glue two googly eyes to the top or side of a bottle cap and cut out some red claws and legs out of red foam paper. (If you aren't planning on using water, use red construction paper.) However, while you're waiting on this little dude to dry, start creating a home for him. You can be creative. I tried creating a sensory bin for him to live in, jars filled with different items. Submit your crab homes to kiddocrafts@gmail.com to be added to the blog!
Dinosaur Swamp Land! (Not as gross as it looks!)
Swamp Land Sensory Play Bin |
Here is a messy looking swamp land for your child to enjoy and explore. I started by adding a small layer of dark colored sand and adding some water. Once you stir the mixture up, it'll look like dark swampy water. Next walk around outside and find some items to include (Rocks, sticks, plant life, dried leaves etc.) I added in two extra items, that are completely optional. First I dropped a bunch of aqua beads (dollar store) in some blue paint, rolled them around on a paper towel to remove some of the paint, then let them dry outside in the sun for an hour. This creates a mystery egg type object your kids will love. They are squishy, slippery, and almost disappear once they fall into the water. Next I added a couple of foam sticky balls (dollar store) to create an algae effect that will float on the water top.
Saturday, March 30, 2013
Dinosaur Tracks Art Project- Using Dinosaur Toys!
Materials needed: Dinosaurs, Paint, Q-Tips, Paper Plate, Paper.
This was the first project of dinosaur week. Something easy, fun, and uses the toys they already have. It helps to have a variety of dinosaurs so you can talk about the differences between the types of feet.
When I first started this project, I simply had the kids dip their dinosaur's feet in the paint. However, this resulted in mostly paint blobs, making it hard to even tell it was a footprint. We then switched to painting the bottom of their feet with a q-tip. Much better results. After the project, a few of the girls decided to give all the dinosaurs a bath in the sink to clean them up.
Cereal Name Tracing
Materials needed: Paper plate, glue, q-tips, cereal, and paper.
Easy and fun for the kids. Write their name on a piece of construction paper. Many of my kids are at different stages when it comes to learning how to write their names. One of our biggest issues with the kids is breaking them of the habit of writing their name is all capital letters. This gave them the opportunity to learn and explore lowercase letters in a less traditional way.
First the students would trace the first letter using glue and a q-tip. I encouraged them to hold the q-tip how they would a pencil. Then, they could add the fruit loops along the glue. I made sure they did one letter at a time otherwise the glue would dry too quickly. Most of my kids picked random colors, but a few decided to make patterns. It was really fun for the kids and incredibly simple.
Sunday, March 17, 2013
Cheeto Your Teacher! (Shaving Cream+Cheetos)
Materials needed: Shaving cream, food coloring (optional), puffy cheetos.
This was probably my favorite Friday Funday activity! Since we knew it'd be 70 degrees we wanted a silly/messy outdoor activity for the kids. This activity only requires three things: puffy cheetos, shaving cream, and a teacher not afraid to get messy.
Instructions:
Step one: Have teacher cover upper body with shaving cream. We added some green food coloring because it was the Friday before St. Patrick's Day.
Step two: Have kids stand behind a line and toss puffy cheetos at the teacher. If it sticks- they get to throw again! Some of our younger kids were having a lot of trouble getting it to stick, so after a few tries we would let them walk up and stick it to him. We actually ended up running out of shaving cream. The more the better! It works better if you do a base layer and then add more without rubbing it in.
Friday, March 15, 2013
Aqua Balls Sensory Bin
This is the cheapest sensory bin I have ever done and the kids love it. I bought a jar of aqua balls from the dollar store. (They're normally used for filling decorative vases, called clear floral hydration beads)
I then added a few cups of water and light green food coloring. Before I added the food coloring the aqua balls were completely invisible in the water. I think that'd be a fun bin to play with, but I wanted some green for St. Patrick's Day, so I'll probably save that for a different day.
I added an ice cube tray for them to place the aqua balls in. They could use the spoon or their hands. These balls are really difficult to pick up because they slip right out of your hand and bounce away. Sometimes I have found that after a few days the aqua balls get a bit of an odor to them. However, for $1 they can be easily replaced for hours of fun.
Thursday, March 14, 2013
Green Sensory Table
Materials needed: Different types of pasta, rice, green food coloring, green rocks, sugar, acorns, scoopers, spoons, containers etc.
Well, I decided to walk around my house and collect everything that was green. If it wasn't green, I used food coloring and dyed it green. Since St. Patrick's day is just around the corner, my kids decided to make houses and cupcakes for leprechauns.
The first thing I did was walk into my kitchen and pick out a few items. I chose two types of dry pasta, rice, ramen noodles, and sugar. I dyed some light green and some dark green. I know there are a bunch of ways to dye food, but I just poured some food coloring in and stirred. My favorite is the sugar because it looks sparkly once you add food coloring. Just make sure you break up the clumps from the dye.
Wednesday, February 13, 2013
Pink Sensory Bin
Materials needed: rice, food coloring, pom-poms, heart shaped beads, glitter, pink necklace, wiggle worm, craft sequins.
A little back story to explain why I made this particular bin- I bought one of these magical wiggle worms from the dollar store. It's the kind with the invisible string allowing you to make it do tricks. My kids fell in love, and I am not exaggerating. They made an entire back story for my blue worm (who they named Mike) and love to build him houses. They also decided he doesn't like it when kids are loud so they make sure to be quiet when he is out. Since Valentines Day is coming up, I thought that Mike needed love too. This is Mike's girlfriend, not yet named and her house. I'm interested to see what they will come up with. :)
Ocean Themed Sensory Bin
Materials used: water, food coloring, plastic coins, growing starfish, aqua beads, rocks, small bottle, netting.
I found all of the necessary materials at the dollar store. My favorite part of this bin would definitely have to be the water beads. I am not sure what they are actually called. (Some stores call them hydrating beads, but it depends on the store.) They are usually used to fill decorative vases. They are really fun to hold because they slip out of your hand and bounce.
Saturday, February 2, 2013
Cootie Art (Straw Blowing Paint Activity)
Materials needed: Paint (3-4 different colors), straws, cups, spoons, paper (the thicker the better), googly eyes, glue.
The first thing you need to do is water down your paint. The white/purple/green cups show how much paint I started with. The orange/yellow/red cups shows how much water I added. Make sure you stir the mixture a lot. If the paint is too thick, this will not work at all. You want the paint to be really watery and smooth.
Wednesday, January 30, 2013
Bubble Blowing Art
Materials Needed: Bubble mixture, Bubble wand, Food coloring, Cups, Paper (Card-stock or thicker paper preferred)
Instructions:
I did this two different ways. The first time I did this I turned a table on the side and taped a piece of paper to it. I figured if they were blowing bubbles onto the paper this would be the most natural way. However, most of the younger ones had a lot of trouble getting it to reach the paper. However, the kids still had fun and were excited to be able to blow bubbles inside.
Sunday, January 27, 2013
Homemade Lava Lamps (Video)
Materials needed: Bottle or Jar, Vegetable Oil, Water, Food Coloring, Alka-Seltzer Tablets
Instructions:
Fill 1/4 of the bottle with water.
Add any color food coloring. We did red to look like lava and then made a blue one.
Fill the rest of the bottle with Vegetable Oil.
Allow it to settle for about five minutes.
The water and oil should be completely separated with the oil on top. The bottles should look something like this. For the red bottle I ran out of Vegetable Oil, you can fill them almost to the top.
Fill the rest of the bottle with Vegetable Oil.
Allow it to settle for about five minutes.
The water and oil should be completely separated with the oil on top. The bottles should look something like this. For the red bottle I ran out of Vegetable Oil, you can fill them almost to the top.
Friday, January 25, 2013
Fun Activities for Freezing Weather (VIDEOS)
1. Make Your Own Cloud
Materials needed: Boiling water, cup, temperature under 32 degrees.
We did this when it was 18 degrees outside. Ours ended up looking like a rain cloud. The kids thought this was really cool. As soon as the water leaves the cup it turns to it's gas form before it hits the ground creating an almost instant cloud. Ours even rained a little after. However, if you do this in temperatures under what we had you will just get the cloud.
Video
Video
Slime Creatures!
Instructions: In a medium sized bowl, pour out two bottles of glue. Fill up those two bottles with warm water and pour those in. Add some food coloring and mix well. I used the gel kind of food coloring, but any kind will work. Mix well.
In a separate cup pour 1/2 cup of water and 1tsp of borax. Mix until the borax dissolves. Pour into slime bowl. Mix with a spoon or tongs until it starts to clump.
Labels:
art projects,
gak,
goo,
oblek,
preschool,
projects,
Sensory,
slime,
slime creatures,
slime monsters
Wednesday, January 16, 2013
Vinegar and Baking Soda Art (Mini Volcanoes)
Instructions: Fill up cups half way with vinegar and add a few drops of food coloring. Have your kiddo fill a paper plate with baking soda. I decided to use Styrofoam because it was a little sturdier than a plain paper plate.
Next, using an eyedropper have your child put drops onto the baking soda. They will enjoy watching and listening to the reaction.
Tuesday, January 15, 2013
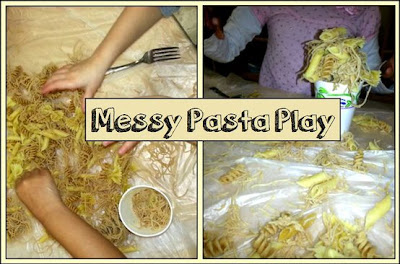
Pasta Play (Sensory Table)
Alright..kids will either really love this activity or hate it! My classroom was about half and half. I took a bunch of different types of pasta and cooked them. I left some uncooked, for a different texture. I gave the kids some forks to twirl the pasta with, along with some different sized cups. Most of the kids ended up making an ice cream stand that sold different types of ice cream. For easy clean up- tape a trash bag to the table. Simply wrap it up and throw it away after.
Friday, January 11, 2013
How to Make Your Own Memory Game
Make your own memory game using recycled bottle caps Kids can put whatever objects inside to match and decorate the tops however they want.
Materials:
- Bottle caps
- Paint
- Glue
- Small items for matching
Snowflake Tutorial
I was surprised at how many people did not know how to make snowflakes! Most of the ones I've seen around just look like squares. Here's how to do them!
Lilly's Purple Plastic Purse Activity
Make your own plastic purple purse!
Materials needed:
- Small plastic sandwich bag. (Not the sealed kind, you need the flap kind)
- Construction Paper
- Tape
- Markers
- Glue
- Scissors
Instructions: Read Kevin Henkes' Lilly's Purple Plastic Purse to your child. Then have the child trace around a sandwich bag on the purple construction paper. Cut out slightly smaller so that you can fit it into the bag, do twice. Measure the flap of the bag and cut out a purple piece that will fit, add a white button out of construction paper. Cut out a handle shape and tape to back. I added clear tape over the top of my handle to give it a little more weight.
Thursday, January 10, 2013
Drawing with Shaving Cream
Tried this out with the kids today. They loved it. I only had one big piece of foam, so I sliced it in half and had two kids at a time. Other kids were so interested I had to let them do it on other tables, without the foam paper. For kids who don't like to get their hands messy or kids who don't like the texture of shaving cream- this whole project can be done in a big Ziploc bag.
Tuesday, January 8, 2013
Sailboats in a Jar
So, I found this idea in a craft book for preschoolers. I was beyond excited to make this with them because I knew they'd like taking it home. However, when I did my test run I could not get the sailboat to stay upright at all. It kept tipping to one side regardless of what I did.
Sunday, January 6, 2013
Glitter Shakers for Kids
Glitter Shakers
Saw this idea on Pinterest and had to try it out. I found mini salt and pepper shakers at Michaels for 25 cents each. I bought a bunch and filled them with different glitter colors. This works perfectly for young kids who usually end up dumping half the bottle out. It's perfect for tiny hands and teaches kids to use glitter in moderation.
Perler Beads Necklace
Materials needed:
- Perler beads
- Perler bead templates
- Iron
- Wax paper
Directions: Have the kids put the beads in whatever pattern they like. Make sure all the beads connect some way. Cover with wax paper, iron until beads melt together. Immediately peel of of wax paper so that it doesn't stick to the back of the beads, let cool and put string through it for a necklace.
Monday, December 31, 2012
Tissue Box Pig
Materials: Tissue box, pink and white foam paper, pink construction paper, one toilet paper roll, Sharpie, glue.
Instructions: Trace around the outside of the kleenex box on pink foam paper. Cut out four squares and glue to sides of kleenex box. Cut a toilet paper roll into fourths and cover with pink construction paper. Glue these to the bottom of the box.
Fingerprint Art
Materials: Paper, ink pad, permanent markers.
Instructions: Show the kids some examples to work from. Once they get the hang of it, they will create their own!
Salad Spinner Art
Materials:
- Paint
- Paper squares
- Glitter
- Salad spinner.
Rock Monsters + Houses
Materials: Rocks, Paint, Googly Eyes, To-Go Boxes, Markers, Scissors.
Instructions: Have the kids paint the rocks and add pipe cleaners and googly eyes. (I used hot glue, but regular glue should be fine if you let the paint fully dry.) While they are doing that, cut out some windows and doors for them on a take home box from any Asian restaurant. While their paint is drying allow them to decorate their rock monster's house with paint, glitter, markers, anything!
Subscribe to:
Posts (Atom)
Tuesday, August 27, 2013
Dollar Store Dinosaur Table
Materials Needed from the dollar store: Storage bin, fake moss, brown box/basket paper shred, different sized rocks, colored rocks, sand.
Instructions: Dump materials on table, watch kids have a blast. My kids seemed to really enjoy this table. They made up stories about the dinosaurs, decided the green rocks were either treasure or dinosaur eggs, and made a meeting place for all the elder dinosaurs. Clean up is easy, just sweep it all back into the bin and bring out another day!
Thursday, August 22, 2013
Animal Track Fossils
Materials needed: 1 cup flour, 1/2 cup salt, 1 tbsp cooking oil, 1 tbsp cream of tartare, 1 cup boiling water, animal toys with different feet.
Step 1: Making the dough. Combine flour, salt, cooking oil, cream of tartare in a large bowl. Add in the cup of boiling water and slowly mix it. It is really important to make sure the water is boiling. I tried with just hot water and the play dough had a completely different consistency. Once it cools a bit, have an adult clump the mixture together until it is cool enough for kids to handle. Knead until desired consistency is reached. Feel free to add some sand to give it a cool texture when it's finished.
Thursday, August 15, 2013
Recycled Crab Craft Activities
Possible Materials needed: Red soda cap, red foam paper, yellow foam balls, glitter, sand, water, jar, foil, googly eyes, green/yellow thread, tape, hot glue, etc.
There are so many things you can do with this cute little guy once you make him. All you have to do is glue two googly eyes to the top or side of a bottle cap and cut out some red claws and legs out of red foam paper. (If you aren't planning on using water, use red construction paper.) However, while you're waiting on this little dude to dry, start creating a home for him. You can be creative. I tried creating a sensory bin for him to live in, jars filled with different items. Submit your crab homes to kiddocrafts@gmail.com to be added to the blog!
Dinosaur Swamp Land! (Not as gross as it looks!)
Swamp Land Sensory Play Bin |
Here is a messy looking swamp land for your child to enjoy and explore. I started by adding a small layer of dark colored sand and adding some water. Once you stir the mixture up, it'll look like dark swampy water. Next walk around outside and find some items to include (Rocks, sticks, plant life, dried leaves etc.) I added in two extra items, that are completely optional. First I dropped a bunch of aqua beads (dollar store) in some blue paint, rolled them around on a paper towel to remove some of the paint, then let them dry outside in the sun for an hour. This creates a mystery egg type object your kids will love. They are squishy, slippery, and almost disappear once they fall into the water. Next I added a couple of foam sticky balls (dollar store) to create an algae effect that will float on the water top.
Saturday, March 30, 2013
Dinosaur Tracks Art Project- Using Dinosaur Toys!
Materials needed: Dinosaurs, Paint, Q-Tips, Paper Plate, Paper.
This was the first project of dinosaur week. Something easy, fun, and uses the toys they already have. It helps to have a variety of dinosaurs so you can talk about the differences between the types of feet.
When I first started this project, I simply had the kids dip their dinosaur's feet in the paint. However, this resulted in mostly paint blobs, making it hard to even tell it was a footprint. We then switched to painting the bottom of their feet with a q-tip. Much better results. After the project, a few of the girls decided to give all the dinosaurs a bath in the sink to clean them up.
Cereal Name Tracing
Materials needed: Paper plate, glue, q-tips, cereal, and paper.
Easy and fun for the kids. Write their name on a piece of construction paper. Many of my kids are at different stages when it comes to learning how to write their names. One of our biggest issues with the kids is breaking them of the habit of writing their name is all capital letters. This gave them the opportunity to learn and explore lowercase letters in a less traditional way.
First the students would trace the first letter using glue and a q-tip. I encouraged them to hold the q-tip how they would a pencil. Then, they could add the fruit loops along the glue. I made sure they did one letter at a time otherwise the glue would dry too quickly. Most of my kids picked random colors, but a few decided to make patterns. It was really fun for the kids and incredibly simple.
Sunday, March 17, 2013
Cheeto Your Teacher! (Shaving Cream+Cheetos)
Materials needed: Shaving cream, food coloring (optional), puffy cheetos.
This was probably my favorite Friday Funday activity! Since we knew it'd be 70 degrees we wanted a silly/messy outdoor activity for the kids. This activity only requires three things: puffy cheetos, shaving cream, and a teacher not afraid to get messy.
Instructions:
Step one: Have teacher cover upper body with shaving cream. We added some green food coloring because it was the Friday before St. Patrick's Day.
Step two: Have kids stand behind a line and toss puffy cheetos at the teacher. If it sticks- they get to throw again! Some of our younger kids were having a lot of trouble getting it to stick, so after a few tries we would let them walk up and stick it to him. We actually ended up running out of shaving cream. The more the better! It works better if you do a base layer and then add more without rubbing it in.
This was probably my favorite Friday Funday activity! Since we knew it'd be 70 degrees we wanted a silly/messy outdoor activity for the kids. This activity only requires three things: puffy cheetos, shaving cream, and a teacher not afraid to get messy.
Instructions:
Step one: Have teacher cover upper body with shaving cream. We added some green food coloring because it was the Friday before St. Patrick's Day.
Step two: Have kids stand behind a line and toss puffy cheetos at the teacher. If it sticks- they get to throw again! Some of our younger kids were having a lot of trouble getting it to stick, so after a few tries we would let them walk up and stick it to him. We actually ended up running out of shaving cream. The more the better! It works better if you do a base layer and then add more without rubbing it in.
Friday, March 15, 2013
Aqua Balls Sensory Bin
This is the cheapest sensory bin I have ever done and the kids love it. I bought a jar of aqua balls from the dollar store. (They're normally used for filling decorative vases, called clear floral hydration beads)
I then added a few cups of water and light green food coloring. Before I added the food coloring the aqua balls were completely invisible in the water. I think that'd be a fun bin to play with, but I wanted some green for St. Patrick's Day, so I'll probably save that for a different day.
I added an ice cube tray for them to place the aqua balls in. They could use the spoon or their hands. These balls are really difficult to pick up because they slip right out of your hand and bounce away. Sometimes I have found that after a few days the aqua balls get a bit of an odor to them. However, for $1 they can be easily replaced for hours of fun.
Thursday, March 14, 2013
Green Sensory Table
Materials needed: Different types of pasta, rice, green food coloring, green rocks, sugar, acorns, scoopers, spoons, containers etc.
Well, I decided to walk around my house and collect everything that was green. If it wasn't green, I used food coloring and dyed it green. Since St. Patrick's day is just around the corner, my kids decided to make houses and cupcakes for leprechauns.
The first thing I did was walk into my kitchen and pick out a few items. I chose two types of dry pasta, rice, ramen noodles, and sugar. I dyed some light green and some dark green. I know there are a bunch of ways to dye food, but I just poured some food coloring in and stirred. My favorite is the sugar because it looks sparkly once you add food coloring. Just make sure you break up the clumps from the dye.
Wednesday, February 13, 2013
Pink Sensory Bin
Materials needed: rice, food coloring, pom-poms, heart shaped beads, glitter, pink necklace, wiggle worm, craft sequins.
A little back story to explain why I made this particular bin- I bought one of these magical wiggle worms from the dollar store. It's the kind with the invisible string allowing you to make it do tricks. My kids fell in love, and I am not exaggerating. They made an entire back story for my blue worm (who they named Mike) and love to build him houses. They also decided he doesn't like it when kids are loud so they make sure to be quiet when he is out. Since Valentines Day is coming up, I thought that Mike needed love too. This is Mike's girlfriend, not yet named and her house. I'm interested to see what they will come up with. :)
Ocean Themed Sensory Bin
Materials used: water, food coloring, plastic coins, growing starfish, aqua beads, rocks, small bottle, netting.
I found all of the necessary materials at the dollar store. My favorite part of this bin would definitely have to be the water beads. I am not sure what they are actually called. (Some stores call them hydrating beads, but it depends on the store.) They are usually used to fill decorative vases. They are really fun to hold because they slip out of your hand and bounce.
Saturday, February 2, 2013
Cootie Art (Straw Blowing Paint Activity)
Materials needed: Paint (3-4 different colors), straws, cups, spoons, paper (the thicker the better), googly eyes, glue.
The first thing you need to do is water down your paint. The white/purple/green cups show how much paint I started with. The orange/yellow/red cups shows how much water I added. Make sure you stir the mixture a lot. If the paint is too thick, this will not work at all. You want the paint to be really watery and smooth.
Wednesday, January 30, 2013
Bubble Blowing Art
Materials Needed: Bubble mixture, Bubble wand, Food coloring, Cups, Paper (Card-stock or thicker paper preferred)
Instructions:
I did this two different ways. The first time I did this I turned a table on the side and taped a piece of paper to it. I figured if they were blowing bubbles onto the paper this would be the most natural way. However, most of the younger ones had a lot of trouble getting it to reach the paper. However, the kids still had fun and were excited to be able to blow bubbles inside.
Sunday, January 27, 2013
Homemade Lava Lamps (Video)
Materials needed: Bottle or Jar, Vegetable Oil, Water, Food Coloring, Alka-Seltzer Tablets
Instructions:
Fill 1/4 of the bottle with water.
Add any color food coloring. We did red to look like lava and then made a blue one.
Fill the rest of the bottle with Vegetable Oil.
Allow it to settle for about five minutes.
The water and oil should be completely separated with the oil on top. The bottles should look something like this. For the red bottle I ran out of Vegetable Oil, you can fill them almost to the top.
Fill the rest of the bottle with Vegetable Oil.
Allow it to settle for about five minutes.
The water and oil should be completely separated with the oil on top. The bottles should look something like this. For the red bottle I ran out of Vegetable Oil, you can fill them almost to the top.
Friday, January 25, 2013
Fun Activities for Freezing Weather (VIDEOS)
1. Make Your Own Cloud
Materials needed: Boiling water, cup, temperature under 32 degrees.
We did this when it was 18 degrees outside. Ours ended up looking like a rain cloud. The kids thought this was really cool. As soon as the water leaves the cup it turns to it's gas form before it hits the ground creating an almost instant cloud. Ours even rained a little after. However, if you do this in temperatures under what we had you will just get the cloud.
Video
Video
Slime Creatures!
Instructions: In a medium sized bowl, pour out two bottles of glue. Fill up those two bottles with warm water and pour those in. Add some food coloring and mix well. I used the gel kind of food coloring, but any kind will work. Mix well.
In a separate cup pour 1/2 cup of water and 1tsp of borax. Mix until the borax dissolves. Pour into slime bowl. Mix with a spoon or tongs until it starts to clump.
Wednesday, January 16, 2013
Vinegar and Baking Soda Art (Mini Volcanoes)
Instructions: Fill up cups half way with vinegar and add a few drops of food coloring. Have your kiddo fill a paper plate with baking soda. I decided to use Styrofoam because it was a little sturdier than a plain paper plate.
Next, using an eyedropper have your child put drops onto the baking soda. They will enjoy watching and listening to the reaction.
Tuesday, January 15, 2013
Pasta Play (Sensory Table)
Alright..kids will either really love this activity or hate it! My classroom was about half and half. I took a bunch of different types of pasta and cooked them. I left some uncooked, for a different texture. I gave the kids some forks to twirl the pasta with, along with some different sized cups. Most of the kids ended up making an ice cream stand that sold different types of ice cream. For easy clean up- tape a trash bag to the table. Simply wrap it up and throw it away after.
Friday, January 11, 2013
How to Make Your Own Memory Game
Make your own memory game using recycled bottle caps Kids can put whatever objects inside to match and decorate the tops however they want.
Materials:
- Bottle caps
- Paint
- Glue
- Small items for matching
Snowflake Tutorial
I was surprised at how many people did not know how to make snowflakes! Most of the ones I've seen around just look like squares. Here's how to do them!
Lilly's Purple Plastic Purse Activity
Make your own plastic purple purse!
Materials needed:
- Small plastic sandwich bag. (Not the sealed kind, you need the flap kind)
- Construction Paper
- Tape
- Markers
- Glue
- Scissors
Instructions: Read Kevin Henkes' Lilly's Purple Plastic Purse to your child. Then have the child trace around a sandwich bag on the purple construction paper. Cut out slightly smaller so that you can fit it into the bag, do twice. Measure the flap of the bag and cut out a purple piece that will fit, add a white button out of construction paper. Cut out a handle shape and tape to back. I added clear tape over the top of my handle to give it a little more weight.
Thursday, January 10, 2013
Drawing with Shaving Cream
Tried this out with the kids today. They loved it. I only had one big piece of foam, so I sliced it in half and had two kids at a time. Other kids were so interested I had to let them do it on other tables, without the foam paper. For kids who don't like to get their hands messy or kids who don't like the texture of shaving cream- this whole project can be done in a big Ziploc bag.
Tuesday, January 8, 2013
Sailboats in a Jar
So, I found this idea in a craft book for preschoolers. I was beyond excited to make this with them because I knew they'd like taking it home. However, when I did my test run I could not get the sailboat to stay upright at all. It kept tipping to one side regardless of what I did.
Sunday, January 6, 2013
Glitter Shakers for Kids
Glitter Shakers
Saw this idea on Pinterest and had to try it out. I found mini salt and pepper shakers at Michaels for 25 cents each. I bought a bunch and filled them with different glitter colors. This works perfectly for young kids who usually end up dumping half the bottle out. It's perfect for tiny hands and teaches kids to use glitter in moderation.
Perler Beads Necklace
Materials needed:
- Perler beads
- Perler bead templates
- Iron
- Wax paper
Directions: Have the kids put the beads in whatever pattern they like. Make sure all the beads connect some way. Cover with wax paper, iron until beads melt together. Immediately peel of of wax paper so that it doesn't stick to the back of the beads, let cool and put string through it for a necklace.
Monday, December 31, 2012
Tissue Box Pig
Materials: Tissue box, pink and white foam paper, pink construction paper, one toilet paper roll, Sharpie, glue.
Instructions: Trace around the outside of the kleenex box on pink foam paper. Cut out four squares and glue to sides of kleenex box. Cut a toilet paper roll into fourths and cover with pink construction paper. Glue these to the bottom of the box.
Fingerprint Art
Materials: Paper, ink pad, permanent markers.
Instructions: Show the kids some examples to work from. Once they get the hang of it, they will create their own!
Salad Spinner Art
Materials:
- Paint
- Paper squares
- Glitter
- Salad spinner.
Rock Monsters + Houses
Materials: Rocks, Paint, Googly Eyes, To-Go Boxes, Markers, Scissors.
Instructions: Have the kids paint the rocks and add pipe cleaners and googly eyes. (I used hot glue, but regular glue should be fine if you let the paint fully dry.) While they are doing that, cut out some windows and doors for them on a take home box from any Asian restaurant. While their paint is drying allow them to decorate their rock monster's house with paint, glitter, markers, anything!
Subscribe to:
Posts (Atom)